ChevyParts
My Garage
My Account
Cart
OEM Cadillac Catera A/C Switch
Air Conditioning Switch- Select Vehicle by Model
- Select Vehicle by VIN
Select Vehicle by Model
orMake
Model
Year
Select Vehicle by VIN
For the most accurate results, select vehicle by your VIN (Vehicle Identification Number).
2 A/C Switches found

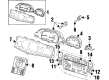
Cadillac Catera Control Assembly Part Number: 9105110
$553.13 MSRP: $1023.38You Save: $470.25 (46%)


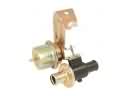
Cadillac Catera Control Assembly Part Number: 24413847
Cadillac Catera A/C Switch
Want to cut long-term maintenance and repair costs? Choose OEM A/C Switch. Those parts deliver top durability you can trust. On our site, you'll find a huge catalog of genuine Cadillac Catera parts. Prices are unbeatable, so you can keep more in your pocket. Every OEM Cadillac Catera A/C Switch includes a manufacturer's warranty. You can also get an easy return policy that keeps buying risk free. Fast delivery, get your car on the road quickly. It's simple to search, compare, and order. Stop guessing about quality or fit. Order today and save with parts that last.
Reliability and performance excellence define the Cadillac Catera A/C Switch which served as an essential mechanism in the Cadillac Catera models constructed from 1996 through 2001. The A/C Switch enables complete climate system management so all occupants can stay comfortable while outside weather persists. Its ability to operate with different Cadillac Catera cars makes the A/C Switch vital because it enables simultaneous operation within the complete line. Precise climate control functions of the Climate Control Module are enabled by the Cadillac Catera A/C Switch to offer efficient and safe driving conditions for all users. Users appreciate the A/C Switch because it has an intuitive interface which includes thetic buttons together with dials that add to the driving pleasure. The Catera stands out in the automotive industry because Cadillac pays great attention to design specifics that demonstrate their dedication to luxury. The car A/C Switch demonstrates robust construction and dependable performance to become the key characteristic which enhances vehicle comfort and reliability. The A/C Switch of the model serves as an enduring legacy that demonstrates the brand's commitment to quality and innovation within the luxury sedan market as the automaker evolves.
Cadillac Catera A/C Switch Parts Questions & Experts Answers
- Q: How to replace the A/C Switch and service the H-A/C control on Cadillac Catera?A:To remove the control assembly, first, we should remove the radio/tape player and the heating and A/C control (H-A/C) screws. Then, we should disconnect the H-A/C control electrical connections and remove it. In servicing the H-A/C control indicator bulbs, bracket, or Printed Circuit Board (PCB), press the tabs on the side of the control face to release the H-A/C and slide it out from the bracket. Flattened-bladed tool to twist the H-A/C control and the bulbs at its indicator away in a counterclockwise direction to remove and ultimately, extracting the PCB and ribbon from the H-A/C control. For installation, installation of PCB to the H-A/C control followed by the ribbon, if applicable. Turn the H-A/C control indicator bulbs clockwise using a flat-bladed tool to install them. Sliding the PCB into the slot and snapping H-A/C control face to bracket. Install the H-A/C control and connect the electrical connectors ensuring to install the H-A/C control with screws until fully seated without stripping. Finally, reinstall radio/tape player and program the H-A/C control with scan tool, choose the programming procedure from Air Conditioning Special Functions menu and follow on-screen instruction.

Related Cadillac Catera Parts
 Cadillac Catera Heater Control Valve
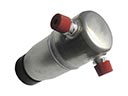 Cadillac Catera A/C Accumulator
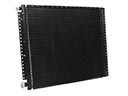 Cadillac Catera A/C Condenser
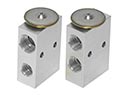 Cadillac Catera A/C Expansion Valve
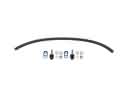 Cadillac Catera A/C Hose
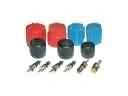 Cadillac Catera A/C System Valve Core
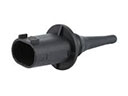 Cadillac Catera Ambient Temperature Sensor
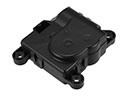 Cadillac Catera Blend Door Actuator
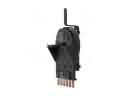 Cadillac Catera Blower Control Switches
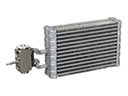 Cadillac Catera Evaporator
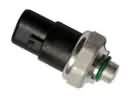 Cadillac Catera HVAC Pressure Switch
 Cadillac Catera Heater Core