ChevyParts
My Garage
My Account
Cart
OEM Cadillac DTS Fan Shroud
Radiator Fan Shroud- Select Vehicle by Model
- Select Vehicle by VIN
Select Vehicle by Model
orMake
Model
Year
Select Vehicle by VIN
For the most accurate results, select vehicle by your VIN (Vehicle Identification Number).
1 Fan Shroud found


Cadillac DTS Fan Shroud Part Number: 21999691
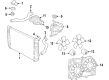
Cadillac DTS Fan Shroud
Want to cut long-term maintenance and repair costs? Choose OEM Fan Shroud. Those parts deliver top durability you can trust. On our site, you'll find a huge catalog of genuine Cadillac DTS parts. Prices are unbeatable, so you can keep more in your pocket. Every OEM Cadillac DTS Fan Shroud includes a manufacturer's warranty. You can also get an easy return policy that keeps buying risk free. Fast delivery, get your car on the road quickly. It's simple to search, compare, and order. Stop guessing about quality or fit. Order today and save with parts that last.
The Fan Shroud is one of the crucial parts which really helps to reinforce the cooling system of Cadillac DTS. The Fan Shroud is created exclusively for the different DTS models made from 2005 up to 2011 and helps in formulating the expedition of air around the cooling fan more effectively apart from shielding the blades of the fan from any forms of pollution. This protective feature is relevant in the preservation of its efficiency and helpful for the continuous functionality of the cooling system that is conducive to the optimality of Cadillac DTS. By improving the cooling rate of devices such as the car engine, the Cadillac DTS, which is associated with luxurious comfort and amenities, will also gain an advantage because of the Fan Shroud's role in boosting its cooling capacity, and consequently, its power and safety features. While varying the kind of Fan Shroud in use for every model of DTS, each model depicts a gain in technological and designing proficiencies thereby enhancing the vehicle's sturdiness and cooling. Thus, in automotive market, the Fan Shroud is presented as product that is constructed and engineered to become highly durable, and would have the proper cooling solutions for the specific Cadillac DTS model. Thus, Fan Shroud is a key component as it helps regulate the temperature of the engine and diminishes the possibility of overheating, which, in turn, ensures the vehicle's efficiency and durability. To sum up, the Fan Shroud is not just an assembly but a component that plays a very crucial role in the smooth, efficient and safe operation of the Cadillac DTS vehicle.
Cadillac DTS Fan Shroud Parts and Q&A
- Q: How to Service and Repair the Fan Shroud on Cadillac DTS?A:Before bringing down the Fan Shroud you must disconnect the battery negative cable and eliminate the condenser and upper tie bar. Then drain the cooling system and detach the front air deflector. You should remove the engine oil cooler pipe retaining bolts (1, 2) from the Fan Shroud when equipped. Then lower the vehicle before using the hose clamp plier (J 38185) to reposition the Radiator inlet hose clamp prior to disconnecting the Radiator inlet hose from the Radiator. The next procedure involves eliminating the transmission oil cooler pipe retaining bolts that secure the Fan Shroud as well as disconnecting transmission lines from the Radiator and disconnecting the wiring harness electrical connectors that connect to the cooling Fan Motors. Detach both harness clips which connect to the Fan Shroud as well as the electric cooling fan mounting bolts. Take out the electric cooling fan assembly while moving it left across the vehicle with upward right-side pulling followed by right-side movement and final upward removal. Position the cooling fan assembly behind the Radiator before moving it to the right side followed by downward pressure on the right side until the lower feet align with the mounting tabs of the Radiator while using only specific-length bolts for retention. Secure the electric cooling fan mounting bolts at 6 n.m (53 lb in) and sequence the wiring harness electrical connectors to the cooling fan motors before you fasten the wiring harness retaining clips onto the Fan Shroud. Position the upper transaxle oil cooler pipe into the Radiator quick connect fitting until you hear a "click" noise before gently pulling to verify proper connection and then apply the plastic cap to the fitting. Connect the transmission oil cooler pipe retaining bolts to the Fan Shroud while tightening each bolt to 6 n.m (53 lb in). Next, install the Radiator inlet hose to the Radiator before positioning the clamp with the hose clamp plier (J 38185). Install the engine oil cooler pipe retaining bolts (1, 2) to the Fan Shroud at 6 n.m (53 lb in) torque then add the front air deflector and the condenser and the upper tie bar after vehicle lowering. Complete the filling of the cooling system then connect the battery negative cable before checking the engine oil level.

Related Cadillac DTS Parts
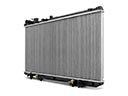 Cadillac DTS Radiator
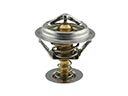 Cadillac DTS Thermostat
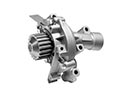 Cadillac DTS Water Pump
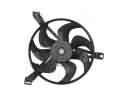 Cadillac DTS A/C Condenser Fan
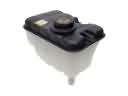 Cadillac DTS Coolant Reservoir
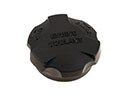 Cadillac DTS Coolant Reservoir Cap
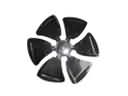 Cadillac DTS Fan Blade
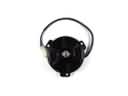 Cadillac DTS Fan Motor
 Cadillac DTS Radiator Hose
 Cadillac DTS Thermostat Gasket
 Cadillac DTS Thermostat Housing
 Cadillac DTS Water Pump Gasket