ChevyParts
My Garage
My Account
Cart
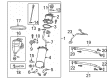
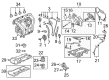
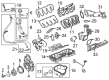
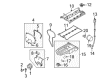
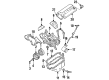
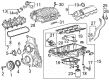
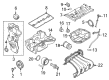
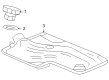
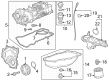
OEM Chevrolet Oil Filler Cap
Engine Oil Filler Cap- Select Vehicle by Model
- Select Vehicle by VIN
Select Vehicle by Model
orMake
Model
Year
Select Vehicle by VIN
For the most accurate results, select vehicle by your VIN (Vehicle Identification Number).
51 Oil Filler Caps found


Chevrolet Filler Cap Part Number: 12680708
$20.98 MSRP: $39.41You Save: $18.43 (47%)Ships in 1-2 Business DaysProduct Specifications- Other Name: Cap Assembly-Oil Filler; Oil Filler Cap; Cap, Engine Oil Filler


Chevrolet Valve Cover Cap Part Number: 12621520
$21.42 MSRP: $40.22You Save: $18.80 (47%)Ships in 1-3 Business DaysProduct Specifications- Other Name: Cap Assembly-Oil Filler; Oil Filler Cap; Filler Cap; Cap, Engine Oil Filler


Chevrolet Filler Cap Part Number: 12573341
$5.62 MSRP: $10.57You Save: $4.95 (47%)Ships in 1-2 Business DaysProduct Specifications- Other Name: Cap Assembly-Oil Filler; Oil Filler Cap; Cap, Engine Oil Filler


Chevrolet Filler Cap Part Number: 96469205
$15.92 MSRP: $29.89You Save: $13.97 (47%)Ships in 1-2 Business DaysProduct Specifications- Other Name: Cap Assembly, Oil Filler; Oil Filler Cap; Cap, Engine Oil Filler


Chevrolet Filler Cap Part Number: 10110859
$14.35 MSRP: $25.62You Save: $11.27 (44%)Ships in 1-3 Business DaysProduct Specifications- Other Name: Cap Assembly-Oil Filler; Oil Filler Cap; Cap, Crankcase Oil Filler; Cap, Engine Oil Filler


Chevrolet Filler Cap Part Number: 12667313
$7.65 MSRP: $13.65You Save: $6.00 (44%)Product Specifications- Other Name: Cap Assembly-Oil Filler (0W-20); Oil Filler Cap; Cap, Engine Oil Filler
- Replaced by: 12713785
- Replaces: 12634022


Chevrolet Filler Cap Part Number: 19317324
$3.45 MSRP: $6.16You Save: $2.71 (44%)Ships in 1-3 Business DaysProduct Specifications- Other Name: Cap Assembly, Oil Filler; Oil Filler Cap; Cap, Engine Oil Filler


Chevrolet Filler Cap Part Number: 24243519
$6.56 MSRP: $10.30You Save: $3.74 (37%)Product Specifications- Other Name: Cap, Transmission Fluid Filler (W/Vent); Cap, Transmission Oil Filler
- Replaced by: 24297124


Chevrolet Filler Cap Part Number: 12697069
$29.06 MSRP: $51.90You Save: $22.84 (45%)Ships in 1-2 Business DaysProduct Specifications- Other Name: Cap, Oil Filler; Cap, Engine Oil Filler

Chevrolet Filler Cap Part Number: 24586275
$8.03 MSRP: $14.55You Save: $6.52 (45%)Ships in 1-2 Business DaysProduct Specifications- Other Name: Cap Assembly-Oil Filler; Oil Filler Cap; Cap, Engine Oil Filler
- Replaces: 24584394

Chevrolet Filler Cap Part Number: 55494241
$34.46 MSRP: $68.40You Save: $33.94 (50%)Ships in 1-2 Business DaysProduct Specifications- Other Name: Cap Assembly-Oil Filler; Oil Filler Cap; Cap, Engine Oil Filler

Chevrolet Filler Cap Part Number: 25202484
$6.48 MSRP: $12.16You Save: $5.68 (47%)Ships in 1-2 Business DaysProduct Specifications- Other Name: Cap Assembly-Oil Filler; Oil Filler Cap; Cap, Engine Oil Filler


Chevrolet Filler Cap Part Number: 12631205
$12.06 MSRP: $21.82You Save: $9.76 (45%)Ships in 1-2 Business DaysProduct Specifications- Other Name: Cap, Oil Filler; Oil Filler Cap; Cap, Engine Oil Filler


Chevrolet Filler Cap Part Number: 12612181
$10.64 MSRP: $19.98You Save: $9.34 (47%)Ships in 1-2 Business DaysProduct Specifications- Other Name: Cap Assembly-Oil Filler; Oil Filler Cap; Cap, Engine Oil Filler
Chevrolet Filler Cap Part Number: 96413100
$20.64 MSRP: $38.75You Save: $18.11 (47%)Ships in 1-2 Business DaysProduct Specifications- Other Name: Cap Assembly, Oil Filler; Oil Filler Cap; Cap, Engine Oil Filler
- Replaces: 96351602

Chevrolet Filler Cap Part Number: 55580782
$16.51 MSRP: $31.00You Save: $14.49 (47%)Ships in 1-2 Business DaysProduct Specifications- Other Name: Cap Assembly-Oil Filler; Oil Filler Cap; Cap, Engine Oil Filler

Chevrolet Filler Cap Part Number: 12716054
$5.48 MSRP: $9.78You Save: $4.30 (44%)Ships in 1-2 Business DaysProduct Specifications- Other Name: Cap Assembly-Oil Filler; Cap, Engine Oil Filler


Chevrolet Filler Cap Part Number: 55513278
$6.89 MSRP: $12.30You Save: $5.41 (44%)Ships in 1-3 Business DaysProduct Specifications- Other Name: Cap Assembly-Oil Filler; Oil Filler Cap; Cap, Engine Oil Filler
- Replaces: 12668659

Chevrolet Filler Cap Part Number: 12694539
$7.61 MSRP: $12.12You Save: $4.51 (38%)Ships in 1-2 Business DaysProduct Specifications- Other Name: Cap Assembly-Oil Filler; Oil Filler Cap

Chevrolet Filler Cap Part Number: 55510927
$9.17 MSRP: $17.22You Save: $8.05 (47%)Ships in 1-2 Business DaysProduct Specifications- Other Name: Cap Assembly-Oil Filler; Oil Filler Cap; Cap, Engine Oil Filler
- Replaced by: 12716056
| Page 1 of 3 |Next >
1-20 of 51 Results
Chevrolet Oil Filler Cap
Choose OEM Oil Filler Cap, you're making the optimal decision for superior quality and perfect performance. You can feel confident because each component goes through stringent quality checks. Every part is carefully built to comply with Chevrolet's factory specifications. You'll enjoy a smooth, worry-free installation that fits just right. At ChevyPartsGiant.com, you'll find it easy to get top-quality OEM Chevrolet Oil Filler Cap. You can shop at highly competitive prices and protect your budget. All our genuine Chevrolet parts include a dependable manufacturer's warranty. You'll also appreciate our straightforward return policy and swift delivery services for extra convenience.
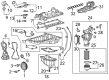
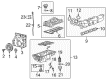
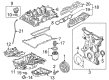
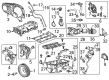
Chevrolet Oil Filler Cap closes the open end of the engine to protect the new oil as well as maintenance of pressure, preventing loss of horsepower and longevity of the engine. Since 1911, Chevrolet has developed its reputation by developing cars and trucks with muscular appearance and everyday comfort, and recent cars demonstrate improved engines, sharp handling, and intelligent driver aids such as the hands-free Super Cruise system whereby highway miles become time off. Whether you are packing for a coast to coast trip with your family or driving solo and covering the city streets, Chevy has plenty of cabin space, aggressive appearance, and the assurance that you have dependable engineering under the hood. Another aspect that the fans love about Chevy is the ease of updates so that owners can easily replace parts without using special equipment. The Oil Filler Cap is a small yet important screw on lid consisting of a robust gasket that prevents dust entry and also ensures that oil vapor passes through the right path. The installation of a new cap is simple. Find a flat place to park and turn off the engine and allow the engine to cool. Wipe down the filler neck to ensure nothing falls in. Unscrew the old cap taking care not to leave that stuffy rubber on the neck. Look at the threads to see whether it has been damaged, and then make the new cap in position, and turn it clockwise by hand until firmly seated, but take care not to overturn. Engine should be started, leaks sniffed, quick run made and the cap made to be sure it is still firmly seated.
Related Chevrolet Parts
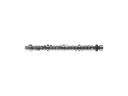 Chevrolet Camshaft
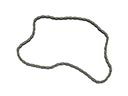 Chevrolet Timing Chain
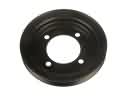 Chevrolet Crankshaft Pulley
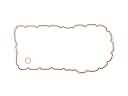 Chevrolet Oil Pan Gasket
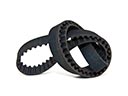 Chevrolet Timing Belt
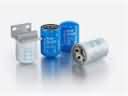 Chevrolet Coolant Filter
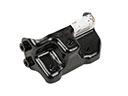 Chevrolet Engine Mount Bracket
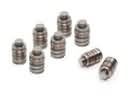 Chevrolet Lash Adjuster
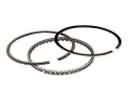 Chevrolet Piston Ring
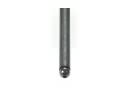 Chevrolet Pushrod
 Chevrolet Rod Bearing
 Chevrolet Valve Stem Oil Seal
Browse Chevrolet Oil Filler Cap by Models
S10 Colorado Tahoe Cruze Malibu Camaro Equinox Impala SS SSR Avalanche Silverado 1500 Silverado 2500 HD Caprice Classic Cobalt Suburban Traverse Blazer HHR Sonic Tracker Volt Spark Trax Trailblazer Cavalier Corvette Aveo City Express Express 1500 Express 2500 Express 3500 Lumina Metro Monte Carlo Prizm Uplander Venture Suburban 1500 Trailblazer EXT Aveo5 Captiva Sport Cruze Limited Impala Limited Malibu Limited Silverado 1500 Classic Silverado 1500 LD Silverado 1500 LTD Silverado 3500 HD Spark EV Suburban 2500