ChevyParts
My Garage
My Account
Cart
OEM Chevrolet S10 Hood Cable
Hood Release Cable- Select Vehicle by Model
- Select Vehicle by VIN
Select Vehicle by Model
orMake
Model
Year
Select Vehicle by VIN
For the most accurate results, select vehicle by your VIN (Vehicle Identification Number).
3 Hood Cables found


Chevrolet S10 Release Cable Part Number: 15732159
$93.20 MSRP: $138.71You Save: $45.51 (33%)Ships in 1-3 Business Days
Chevrolet S10 Release Cable Part Number: 15097973
$40.47 MSRP: $60.23You Save: $19.76 (33%)Ships in 1-3 Business Days

Chevrolet S10 Release Cable Part Number: 15627455
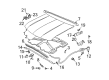
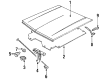
Chevrolet S10 Hood Cable
Want to cut long-term maintenance and repair costs? Choose OEM Hood Cable. Those parts deliver top durability you can trust. On our site, you'll find a huge catalog of genuine Chevrolet S10 parts. Prices are unbeatable, so you can keep more in your pocket. Every OEM Chevrolet S10 Hood Cable includes a manufacturer's warranty. You can also get an easy return policy that keeps buying risk free. Fast delivery, get your car on the road quickly. It's simple to search, compare, and order. Stop guessing about quality or fit. Order today and save with parts that last.
Chevrolet S10 Hood Cable Parts Questions & Experts Answers
- Q: How to replace the Hood Cable on Chevrolet S10?A:Start the replacement of Hood Cable by first opening and supporting the hood and secondly disconnecting the negative Battery Cable. The underhood fuse block must be removed first by unplugging the windshield wiper Washer Reservoir before you remove the securing screws. Following this you can pull the unit from the fender. The Hood Latch must remain blocked to avoid locking mechanisms until you install the new cable. A flat-bladed tool will free the clip on the primary latch assembly to allow you to uninstall the cable assembly from the primary latch. The installation process requires home mechanics to authorize wire usage as a cable extension. A flat-bladed tool should be used to open the hoodie retention clips. The Hood Cable must be pulled backwards through an opening between the radiator support and left fender along with behind the antilock brake module. The body hinge trim panel and Hood Cable grommet require removal along with the adhesive tape that supports the cable near the cowl. Take out the Hood Cable from the vehicle while guiding the cable through the cowl panel beneath the instrument panel from inside. Start by installing the Hood Latch assembly through the cowl as you direct the cable from inside the vehicle followed by these points: left fender beyond the antilock brake module, underhood fuse block, and windshield wiper/washer reservoir before wrapping it around the radiator support end. Wait to install the cowl side panel Hood Cable and lever bolts until their torque stays at 9 n.m (80 lb in). After that, apply adhesive tape to keep the cable in place on the cowl side. After mounting the Hood Cable within the retaining clips and grommet you should connect it to the Hood Latch cable before the latch itself. Install the body hinge pillar trim panel followed by screws that secure the underhood fuse block and return the windshield wiper/washer reservoir. Last step involves connecting the negative cable while inspecting the Hood Cable for correct operation then closing the hood.

Related Chevrolet S10 Parts
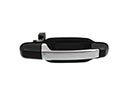 Chevrolet S10 Door Handle
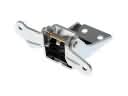 Chevrolet S10 Door Hinge
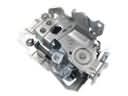 Chevrolet S10 Door Latch Assembly
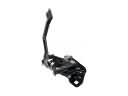 Chevrolet S10 Hood Latch
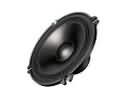 Chevrolet S10 Car Speakers
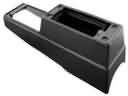 Chevrolet S10 Center Console Base
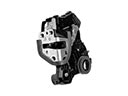 Chevrolet S10 Door Lock
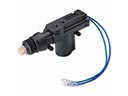 Chevrolet S10 Door Lock Actuator
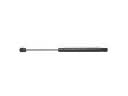 Chevrolet S10 Lift Support
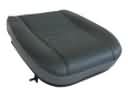 Chevrolet S10 Seat Cushion Pad
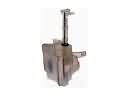 Chevrolet S10 Washer Reservoir
 Chevrolet S10 Weather Strip