ChevyParts
My Garage
My Account
Cart
OEM GMC Envoy Hood Cable
Hood Release Cable- Select Vehicle by Model
- Select Vehicle by VIN
Select Vehicle by Model
orMake
Model
Year
Select Vehicle by VIN
For the most accurate results, select vehicle by your VIN (Vehicle Identification Number).
1 Hood Cable found


GMC Envoy Release Cable Part Number: 21997874
$39.85 MSRP: $62.38You Save: $22.53 (37%)Ships in 1-3 Business Days
GMC Envoy Hood Cable
Want to cut long-term maintenance and repair costs? Choose OEM Hood Cable. Those parts deliver top durability you can trust. On our site, you'll find a huge catalog of genuine GMC Envoy parts. Prices are unbeatable, so you can keep more in your pocket. Every OEM GMC Envoy Hood Cable includes a manufacturer's warranty. You can also get an easy return policy that keeps buying risk free. Fast delivery, get your car on the road quickly. It's simple to search, compare, and order. Stop guessing about quality or fit. Order today and save with parts that last.
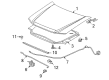
The GMC Envoy Hood Cable serves as a crucial part which unites the hood release lever with the hood latch mechanism so drivers obtain easy access to their engine compartment. The GMC Envoy Hood Cable stands out because of its high performance and reliability and this hood cable key element helps generate efficiency and safety in both First & Second Generation (1998-2000/2002-2009) Envoy models. The Hood Cable helps the GMC Envoy achieve its reputation as a well-engineered design by providing easy hood opening access. The maintenance of GMC Envoy Hood Cables must be regular because damage due to regular use can produce cracks that affect its operational capabilities. The performance of your vehicle depends on timely replacement of a defective Hood Cable since it produces a sticking hood condition. The GMC Envoy Hood Cable distinguishes itself in the automobile industry by combining extended lifespan with simple setup procedures which allow drivers quick access to their power core. The Hood Cable maintains compatibility with different car models to improve driver quality and safety in addition to improving the driving experience. Through its construction the GMC model part demonstrates the automaker's dedication toward building dependable high-performing vehicles thus becoming essential for the car models.
GMC Envoy Hood Cable Parts Questions & Experts Answers
- Q: How to replace the Hood Cable on GMC Envoy?A:In order to replace the Hood Cable, start by taking out the left front door sill plate, then the left closeout/insulator panel and finally the grille. Second, remove the Hood Latch latch and pull down the Hood Cable from the Hood Latch assembly. Add a section of mechanic's wire to the outer end of the cable while remembering the arrangements for later usage, and loosen the retainers handy holding the cable and the inner fender. Feed the cable from between the headlamp housing panel and the Radiator, then push the cable grommet into the panels of the vehicle' interior. Remove the nut that hooks the hood release handle to the cowl trim panel on the left hand side, then remove the cable from the release handle and pull it through the panel cowl, to remove it at the back of sound insulation. Disconnect the mechanic's wire from the cable and leave it in place for an installation assist and remove the cable from the vehicle. For installation, the mechanic's wire should be connected to the external part of the new cable, and follow it on through the sound insulation, coming out through the cowl panel on the exterior part. Mount the cable to the release handle and seat the cable grommet to the cowl panel. Replace the release handle back into the left side kick panel and fasten it with the nut tight to 7 n.m (62 lb in). Mock the cable through the previous mentioned path between the head lamp housing panel to the core supports, secure it to the retainers on the inner fender, and attach it to the Hood Latch assembly. Lastly, replace the Hood Latch, grille, left closeout/insulator panel and left front door sill plate.

Related GMC Envoy Parts
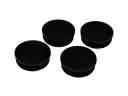 GMC Envoy Body Mount Hole Plug
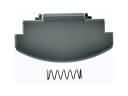 GMC Envoy Center Console Latch
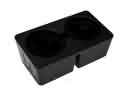 GMC Envoy Cup Holder
 GMC Envoy Dash Panels
 GMC Envoy Door Lock Cylinder
 GMC Envoy Floor Pan
 GMC Envoy Fuel Filler Housing
 GMC Envoy Hood Latch
 GMC Envoy Lift Support
 GMC Envoy Seat Cushion Pad
 GMC Envoy Tailgate Handle
 GMC Envoy Weather Strip