ChevyParts
My Garage
My Account
Cart
OEM GMC Savana 1500 Radiator
Cooling Radiator- Select Vehicle by Model
- Select Vehicle by VIN
Select Vehicle by Model
orMake
Model
Year
Select Vehicle by VIN
For the most accurate results, select vehicle by your VIN (Vehicle Identification Number).
7 Radiators found

GMC Savana 1500 Radiator Part Number: 22795303
$230.78 MSRP: $344.97You Save: $114.19 (34%)Ships in 1-2 Business Days


GMC Savana 1500 Radiator Part Number: 15762438


GMC Savana 1500 Radiator Part Number: 89019164
$258.71 MSRP: $386.71You Save: $128.00 (34%)
GMC Savana 1500 Radiator Part Number: 89019163
GMC Savana 1500 Radiator Part Number: 15766914
GMC Savana 1500 Radiator Part Number: 15762434
GMC Savana 1500 Radiator Part Number: 22795304
$230.78 MSRP: $344.97You Save: $114.19 (34%)
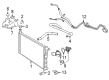
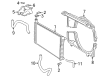
GMC Savana 1500 Radiator
Want to cut long-term maintenance and repair costs? Choose OEM Radiator. Those parts deliver top durability you can trust. On our site, you'll find a huge catalog of genuine GMC Savana 1500 parts. Prices are unbeatable, so you can keep more in your pocket. Every OEM GMC Savana 1500 Radiator includes a manufacturer's warranty. You can also get an easy return policy that keeps buying risk free. Fast delivery, get your car on the road quickly. It's simple to search, compare, and order. Stop guessing about quality or fit. Order today and save with parts that last.
GMC Savana 1500 Radiator Parts and Q&A
- Q: How to replace a radiator and ensure a secure fit on GMC Savana 1500?A:Eccentric jobs to replace a Radiator should always be accompanied by fresh insulators to achieve proper sealing. Start the procedure by removing first the air cleaner assembly and then the coolant recovery reservoir. The inlet Radiator clamp can be released with j 38185 and afterward remove the inlet Radiator Hose. You must detach the outlet heater hose from the Radiator by using j 38185 to remove the clamp at the Radiator outlet. The automatic transmission cooler lines along with the engine oil cooler lines need to be disconnected according to requirements. First disconnect the bolts positioned on top and sides of the Fan Shroud before removing the Radiator and its associated Radiator insulators (1, 3). Check the Radiator as well as its insulators and hoses and clamps and mounting hardware. Perform replacements when essential. Start installation by putting the Radiator insulators (1, 3) before mounting the Radiator. Fasten the Fan Shroud bolts to the Radiator support top position and to the Fan Shroud sides until they reach 6 nm torque (53 lb in torque) resistance. Connect all lines that lead to engine oil cooler devices as well as automatic transmission oil cooler units. Use the j 38185 tool to fasten the inlet hose of the Radiator to its place. Use the j 39529 to attach the outlet heater hose alongside its clamp. Put back the coolant recovery reservoir together with the air cleaner assembly. Inspect both automatic transmission fluid level and engine oil level before completion.

Related GMC Savana 1500 Parts
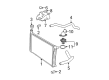
 GMC Savana 1500 A/C Condenser Fan
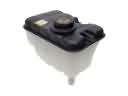 GMC Savana 1500 Coolant Reservoir
 GMC Savana 1500 Cooling Fan Clutch
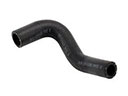 GMC Savana 1500 Cooling Hose
 GMC Savana 1500 Fan Clutch
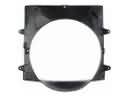 GMC Savana 1500 Fan Shroud
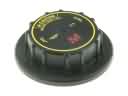 GMC Savana 1500 Radiator Cap
 GMC Savana 1500 Radiator Hose
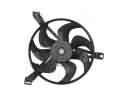
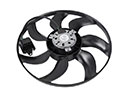 GMC Savana 1500 Radiator fan
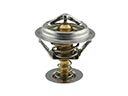 GMC Savana 1500 Thermostat
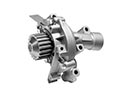 GMC Savana 1500 Water Pump
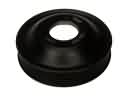 GMC Savana 1500 Water Pump Pulley