ChevyParts
My Garage
My Account
Cart
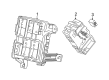
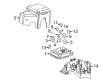
OEM Chevrolet Tahoe Fuse Box
Fuse Holder Box- Select Vehicle by Model
- Select Vehicle by VIN
Select Vehicle by Model
orMake
Model
Year
Select Vehicle by VIN
For the most accurate results, select vehicle by your VIN (Vehicle Identification Number).
19 Fuse Boxes found


Chevrolet Tahoe Junction Block Part Number: 84303175
$198.77 MSRP: $312.75You Save: $113.98 (37%)


Chevrolet Tahoe Junction Block Part Number: 20813086
$211.33 MSRP: $332.50You Save: $121.17 (37%)


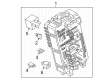
Chevrolet Tahoe Fuse Box Part Number: 12110746
$53.68 MSRP: $83.78You Save: $30.10 (36%)

Chevrolet Tahoe Junction Block Part Number: 84114437
$422.31 MSRP: $664.46You Save: $242.15 (37%)


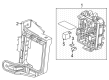
Chevrolet Tahoe Fuse Box, Driver Side Part Number: 84114432
$142.76 MSRP: $224.63You Save: $81.87 (37%)Ships in 1-3 Business Days


Chevrolet Tahoe Junction Block Part Number: 12146281
$32.26 MSRP: $57.60You Save: $25.34 (44%)

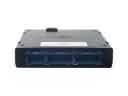
Chevrolet Tahoe Fuse Box Part Number: 84354716
$95.86 MSRP: $171.18You Save: $75.32 (44%)
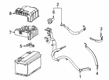
Chevrolet Tahoe Fuse & Relay Box Part Number: 85545271
$70.92 MSRP: $111.07You Save: $40.15 (37%)Ships in 1-3 Business DaysChevrolet Tahoe Fuse & Relay Box Part Number: 84823330
$67.54 MSRP: $105.77You Save: $38.23 (37%)Ships in 1-3 Business DaysChevrolet Tahoe Fuse Box, Driver Side Part Number: 84114431
$168.12 MSRP: $264.54You Save: $96.42 (37%)Ships in 1-3 Business Days
Chevrolet Tahoe Junction Block Part Number: 85147821
$99.83 MSRP: $156.33You Save: $56.50 (37%)Ships in 1-3 Business Days
Chevrolet Tahoe Junction Block Part Number: 84977658
$29.09 MSRP: $45.56You Save: $16.47 (37%)Ships in 1-3 Business Days
Chevrolet Tahoe Fuse & Relay Box Part Number: 84926407
$100.16 MSRP: $156.91You Save: $56.75 (37%)Ships in 1-3 Business Days
Chevrolet Tahoe Junction Block Part Number: 84694244
$118.17 MSRP: $185.93You Save: $67.76 (37%)Ships in 1-3 Business Days
Chevrolet Tahoe Junction Block Part Number: 84694243
$33.92 MSRP: $53.14You Save: $19.22 (37%)Ships in 1-3 Business Days
Chevrolet Tahoe Junction Block Part Number: 84694241
$86.20 MSRP: $135.02You Save: $48.82 (37%)

Chevrolet Tahoe Junction Block Part Number: 12193645


Chevrolet Tahoe Junction Block Part Number: 15786043
$486.48 MSRP: $768.89You Save: $282.41 (37%)
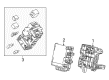
Chevrolet Tahoe Fuse Box, Driver Side Part Number: 23200665
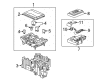
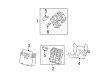
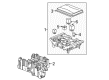
Chevrolet Tahoe Fuse Box
Want to cut long-term maintenance and repair costs? Choose OEM Fuse Box. Those parts deliver top durability you can trust. On our site, you'll find a huge catalog of genuine Chevrolet Tahoe parts. Prices are unbeatable, so you can keep more in your pocket. Every OEM Chevrolet Tahoe Fuse Box includes a manufacturer's warranty. You can also get an easy return policy that keeps buying risk free. Fast delivery, get your car on the road quickly. It's simple to search, compare, and order. Stop guessing about quality or fit. Order today and save with parts that last.
Chevrolet Tahoe Fuse Box Parts and Q&A
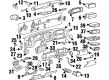
- Q: How to replace the Fuse Box on Chevrolet Tahoe?A:The first step to replace the Fuse Box (Fuse Box) requires users to disconnect negative Battery Cable(s) and eliminate the left side end panel. First detach the Fuse Box from the instrument panel (IP) assembly by depressing the clips at its top and bottom. After that disconnect all wiring connectors from the Fuse Box then remove it from the vehicle. Connect all wiring connectors to the new Fuse Box then embed it onto the ip assembly for installation. Complete seating of the Fuse Box clips at top and bottom positions can be achieved by pressing on the clips so reinstall the left side end panel and reconnect the negative battery cables.
- Q: How to service and repair the Fuse Box on the right side on Chevrolet Tahoe?A:Service and repair of the right side Fuse Box requires first disconnecting all negative Battery Cables and subsequent removal of the right side end panel. The wiring connectors on the instrument panel junction block need detachment from their front position followed by unfastening the harness from its fastener. To remove the ip wiring harness junction block users need to push both clips while pulling the unit backward and disconnect the lower ip light bulb by counterclockwise rotation followed by rearward extraction. The ip wiring harness junction block should be passed through the ip hole after all wiring connectors on the block's rear are detached from the vehicle. The installation process requires connecting wiring connectors to the junction block and passing it through the available hole in the ip. To insert the lower ip light bulb thread the bulb socket clockwise and simultaneously push inward before connecting the ip wiring harness junction block to the ip through squeezing both sealing clips. The workflow ends with installation of the right side end panel and reconnecting negative battery cables while you secure the wiring connector to the ip wiring harness junction block and fasten the harness to its place.


Related Chevrolet Tahoe Parts
 Chevrolet Tahoe Body Control Module
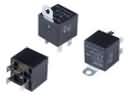 Chevrolet Tahoe Fuel Pump Relay
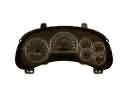 Chevrolet Tahoe Instrument Cluster
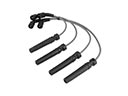 Chevrolet Tahoe Spark Plug Wires
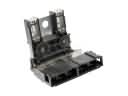 Chevrolet Tahoe Battery Fuse
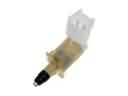 Chevrolet Tahoe Door Jamb Switch
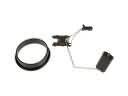 Chevrolet Tahoe Fuel Level Sensor
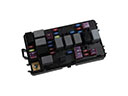 Chevrolet Tahoe Fuse
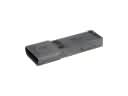 Chevrolet Tahoe Ignition Control Module
 Chevrolet Tahoe Power Window Switch
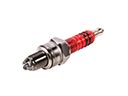 Chevrolet Tahoe Spark Plug
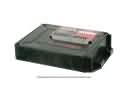 Chevrolet Tahoe Suspension Control Module