ChevyParts
My Garage
My Account
Cart
OEM GMC Envoy Oil Pan
Oil Drain Pan- Select Vehicle by Model
- Select Vehicle by VIN
Select Vehicle by Model
orMake
Model
Year
Select Vehicle by VIN
For the most accurate results, select vehicle by your VIN (Vehicle Identification Number).
3 Oil Pans found

GMC Envoy Oil Pan Part Number: 12613437
$332.93 MSRP: $523.85You Save: $190.92 (37%)Ships in 1-3 Business Days
GMC Envoy Oil Pan Part Number: 24577551
GMC Envoy Oil Pan Part Number: 12584321
$221.43 MSRP: $348.26You Save: $126.83 (37%)
GMC Envoy Oil Pan
Want to cut long-term maintenance and repair costs? Choose OEM Oil Pan. Those parts deliver top durability you can trust. On our site, you'll find a huge catalog of genuine GMC Envoy parts. Prices are unbeatable, so you can keep more in your pocket. Every OEM GMC Envoy Oil Pan includes a manufacturer's warranty. You can also get an easy return policy that keeps buying risk free. Fast delivery, get your car on the road quickly. It's simple to search, compare, and order. Stop guessing about quality or fit. Order today and save with parts that last.
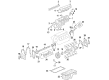
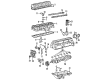
The Oil Pan used in GMC Envoy cars is one of the engine lubrication parts that holds the oil that is fundamental to the engines functioning. Located at the bottom of the engine, oil pan contains motor oil which circulates around the engine to reduce friction with the help of the oil pump. Many vehicles of Envoy come equipped with a wet sump system; the oil pump pick up tube screen is therefore situated at the low side or bottom of the oil sump. The earlier type conventional steel was used for the making of the oil pan; however, Envoy version engines have nowadays come with higher-grade aluminum cast reservoirs. In summary, the Oil Pan in GMC Envoy car is important in proper working of the engine due to its ability to feed the required lubricating oil.
GMC Envoy Oil Pan Parts and Q&A
- Q: How to replace the oil pan on GMC Envoy?A:The first step to replace the Oil Pan is to create a complete Battery Cable failure by disconnecting the negative cable. Unscrew the two A/C Compressor bottom bolts and loosen the top ones (2, 3). Next remove the oil level indicator and tube, as well as the stabilizer shaft. Take out the front drive axle intermediate shaft bearing assembly, remove the front Differential, and secure it to the frame. Drain the engine oil and undo the transmission cooler lines from the engine block. Take off the 4 bolts of the transmission bell housing on Oil Pan and the other bolts of the Oil Pan. Use 2 Oil Pan bolts in the jack screws of the Oil Pan and tighten it evenly to remove it from the engine. Clean and check the Oil Pan before sealing it using a 3 mm (0.12 inch) bead of sealer gm p/n 12378521, to the block. The Oil Pan has to be installed within 10 minutes of application of the sealer. Maneuver the Oil Pan to clear the Oil Pump and screen assembly, making sure that the back of the Oil Pan is flush to the block to prevent alignment problems with the transmission. Install the Oil Pan bolt and check the alignment with the straight edge placed on the rear of the block and Oil Pan transmission mounting surface. Apply torque tighter to Oil Pan side bolts to 25 nm (18 lb ft) and end bolts 10 nm (89 lb in). Mount the four transmission bell housing bolts to the Oil Pan and tighten them to 47 nm (35 lb ft). Clip your transmission cooler lines to the engine block, then install the front drive axle intermediate shaft bearing assembly, oil drain plug, and filter. Refit the front Differential to the engine, and then the stabilizer shaft. Mount the compressor bottom bolts and tighten all 4 bolts (2, 3, 4) to 50 nm (37 lb ft). Finally, in the end install the oil level indicator and tube reconnect the negative Battery Cable, fill the engine with oil make sure, you check for oil leakage, to make sure that all sealing surfaces are sealed properly.

Related GMC Envoy Parts
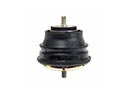 GMC Envoy Engine Mount
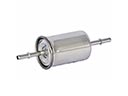 GMC Envoy Fuel Filter
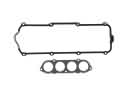 GMC Envoy Valve Cover Gasket
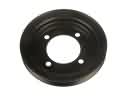 GMC Envoy Crankshaft Pulley
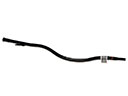 GMC Envoy Dipstick Tube
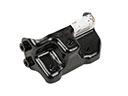 GMC Envoy Engine Mount Bracket
 GMC Envoy Motor And Transmission Mount
 GMC Envoy Oil Pan Gasket
 GMC Envoy Rocker Shaft Spring Kit
 GMC Envoy Rod Bearing
 GMC Envoy Timing Belt Tensioner
 GMC Envoy Timing Cover Gasket